


Easter crafting with Bonnie the Bunny
Guest post by Little Button Diaries
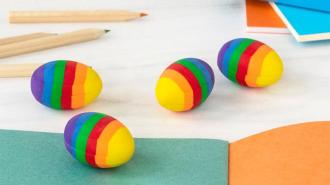
With the Easter holidays fast approaching it’s time to start thinking about ways to entertain the little ones. So we thought we would share a couple of really quick and easy Easter crafting ideas that your kids will love to make, inspired by Rex London's Bonnie the Bunny!
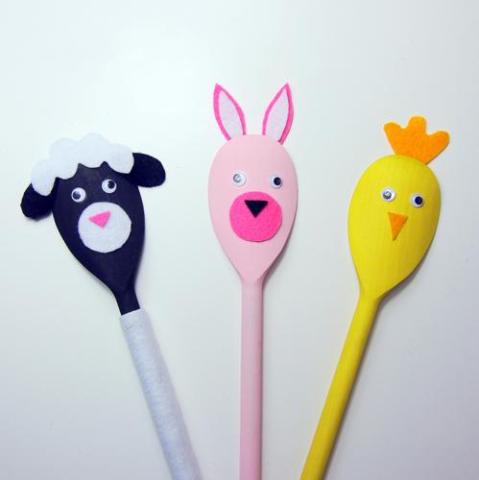
Easter puppets
You will need:
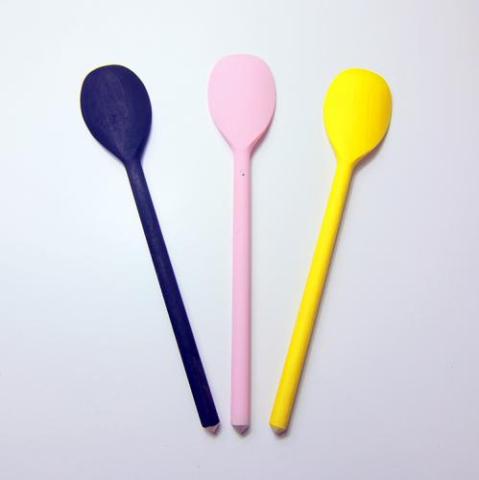
- 3 wooden spoons
- Black, yellow and pink paint
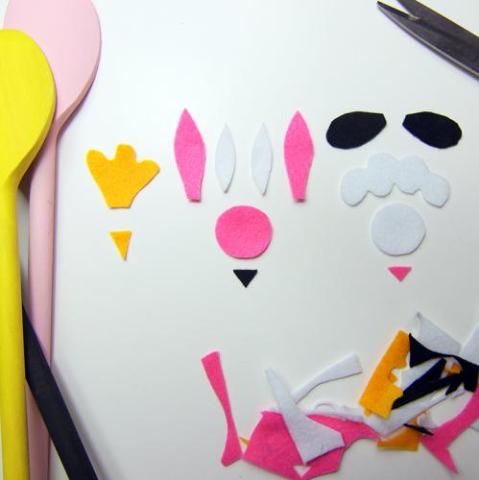
- Orange, pink, white and black scraps of felt
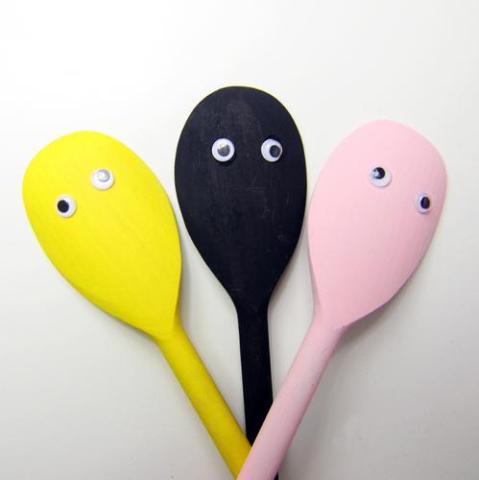
- 6 googly eyes
- Craft glue
How to make:
1. Cover surfaces and paint the spoons all over - paint a pink one for the bunny, a yellow one for the chick and a black one for the sheep. Leave to dry.
2. Cut out the pieces of felt using the template provided (download now), in the colours shown.
3. Glue googly eyes onto the front of the spoons.
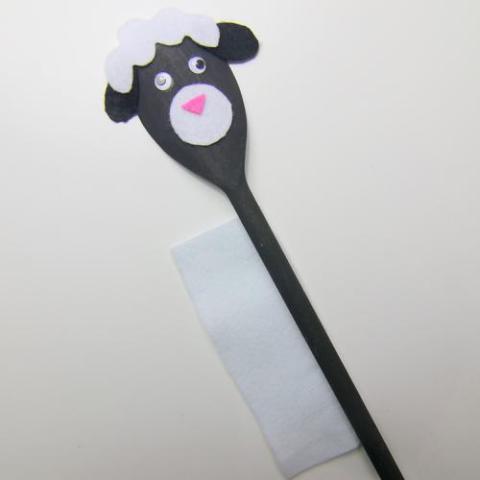
4. For the sheep, glue on the felt ears then add the hair so that the top of the ears are under the hair. Glue on the snout and nose. Cut a strip of white felt that is the length of the handle and wrap it around the spoon. Cut to size and glue in place. You can secure with pegs or rubber bands whilst the glue dries if you need.
5. Glue the felt features onto the bunny, with the ears at the back, and repeat for the chick. Once dry your puppets are all ready to feature in their own little Easter performance!
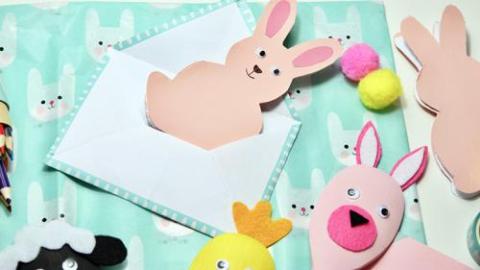
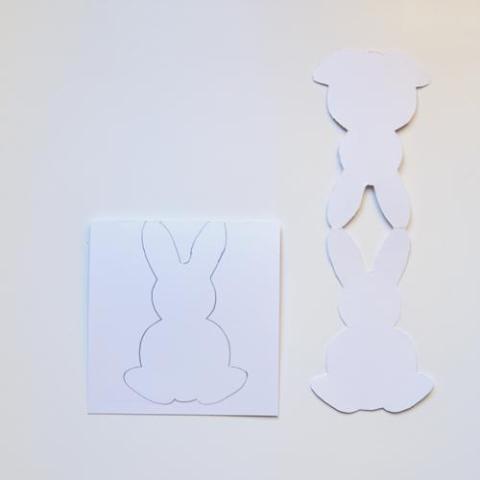
Bunny cards
You will need:
- 3 A4 sheets of white card
- Grey and pastel pink paint
- 3 A4 sheets of coloured paper
- Scrap of pink card
- Glue stick
- 3 pastel coloured small pom poms
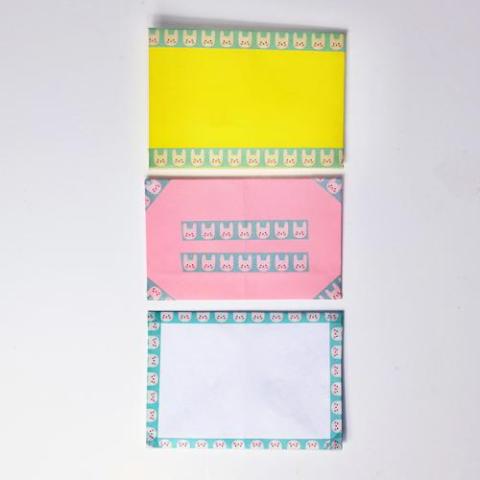
- Bonnie the Bunny washi tape
1. To make the card draw a bunny shape in pencil onto a folded piece of card. Make sure the top of the ears are lined up with the fold of the card so that it remains attached when you open it up. Cut out and repeat to make a few more. Rub out the pencil lines.
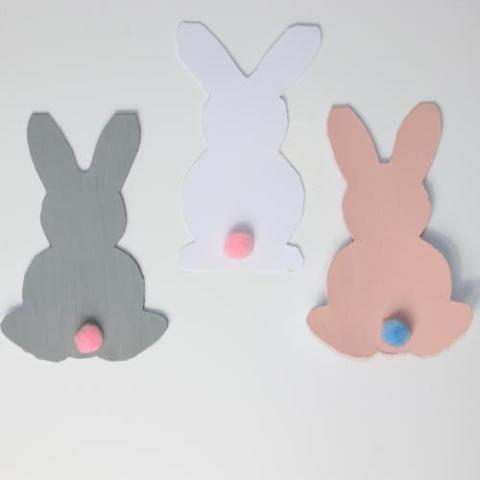
2. Paint the front and back of the card your chosen colour and leave to dry. On the back of the card, glue on a little pom pom bunny tail.
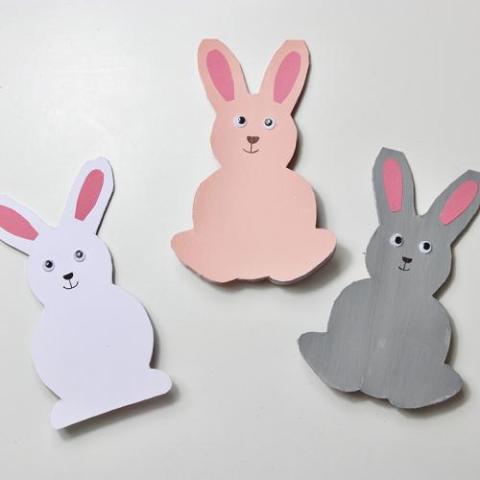
3. Draw a pair of inner ears onto pink card and cut out. Glue these onto the ears on the front of the card. Use pens to draw a little face to finish your card.
4. To make the envelope, cut the A4 pieces of coloured paper into square. Fold two opposite corners into the middle as shown.
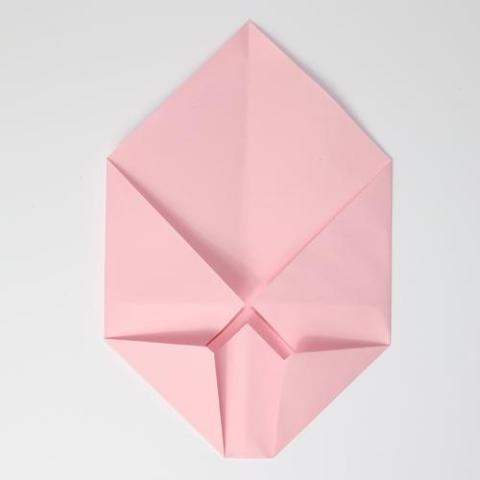
5. Fold the bottom of the paper up, leaving a small gap. Fold the two bottom corners in as shown. Add glue to the folds. Fold the bottom up so that the fold meets with the opening. Press to seal. You can then fold the top part over and tuck it in so that it can be re-used.

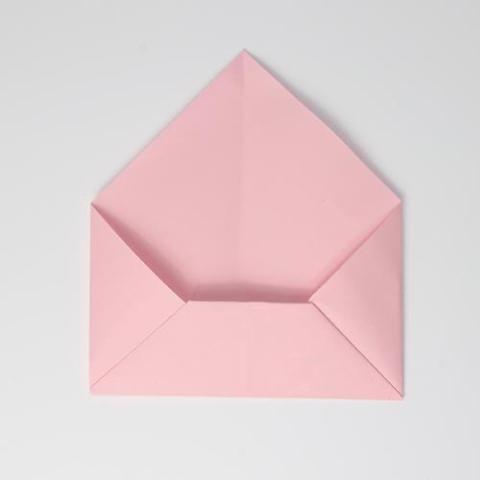
6. Add detail to the envelopes using washi tape.
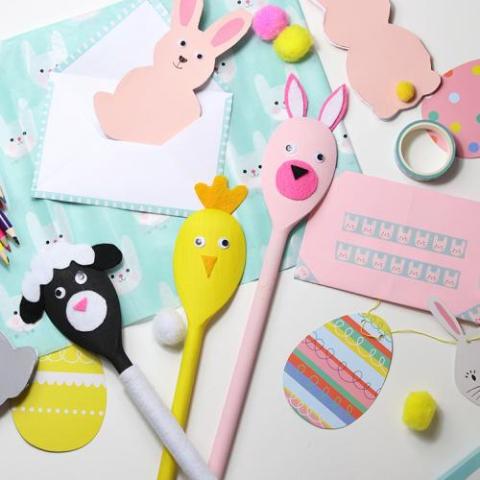
Ta-da! Here's the final collection of Easter craft projects.
Products shown:
Bonnie the Bunny tissue paper, £1.95
Bonnie the Bunny washi tape, £2.95
Easter garland, £1 (was £4.95)
Thank you to Little Button Diaries for those Easter crafts. We'd love to see all your Easter craft projects, so be sure to share them with us using #RexLondon.
Can't get enough bunny goodness? Take a look at our Easter gifts and decorations.