How to make a back to school pen pot
Enjoy a school holiday crafting project that also helps you get ready for back to school with this fun tutorial from Little Button Diaries.

One of the things we love about the new school term is all the shiny new stationery you can pick up. And what better way to organise it all than by getting the kids to make a little upcycled pen pot? Have a little rummage in your recycling bin for some pots and lids with an interesting shape that are the right size for the things you want to store.
You will need:
• A selection of cardboard tubes, pots and lids. We used:
- 3 cardboard tubes
- 1 yoghurt pot
- 2 plastic bottles
- 2 large bottle lids
• Corrugated card (approx. A4 size)
• PVA glue
• Water
• Newspaper
• White, yellow, blue and pink paint
• 1 sheet Spotty Celebration wrapping paper
• Scissors
• Strong glue
• Washi tape
Method:
1. Have a look at the stationery you would like to store in your pen pot, then dig out some suitably sized tubs and tubes from your recycling bin and cut them to size if necessary. For this pot we cut about a quarter from two of the cardboard tubes to fit our pencils, and cut off the bottom third of the plastic bottles, discarding the tops.

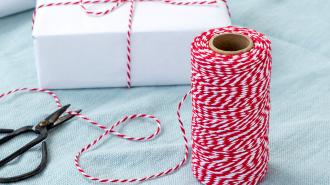
2. Arrange your pots so that they make a good shape. Symmetrical arrangements with no gaps tend to work best. Once you are happy with the arrangement, glue the pots onto corrugated card. If they don’t stay in place on their own, tie a bit of string around them until the glue has set.

3. Once dry, cut away the excess card, close to the bottom edge of the pots.

4. Prepare some papier-mâché paste by mixing one cup of PVA glue with half a cup of water. Tear the newspaper into small squares and add a layer of the paste, then a layer of newspaper, to the pen pot - working in sections. Fill up the whole pen pot in this way - outside and in, where possible. Leave to dry, then add another layer for strength. If you have any left, cover your papier-mâché paste and set to one side to use later!


5. Once the papier-mâché is dry, give the pen pot a base coat of white paint all over.

6. Paint the inside of the pots with colours to match your wrapping paper.

7. Cut or tear the wrapping paper into small pieces (around 1 – 2 cm). Use the papier-mâché paste as before to cover the outside of the pen pot in paper. Leave to dry overnight.


8. Add a washi tape trim around the top of each pot, folding the tape over to the inside. Give the pen pot a nice shine with another coat of PVA glue all over.

Voila! Fill your lovely new pen pot with lots of fun and colourful Rex London stationery.

Thank you to Little Button Diaries for putting together this fun craft project for Rex London!